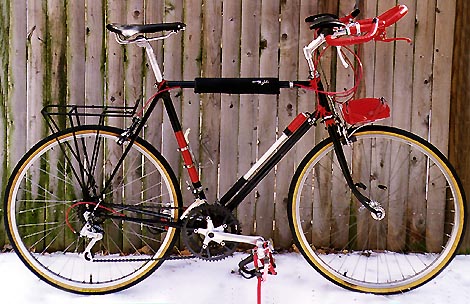
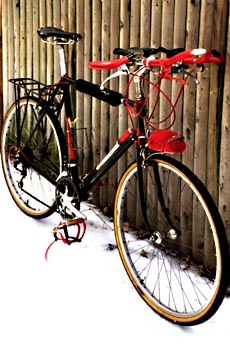
Sheldon Browns Fahrrad mit 63 Gängen
In den 1940er und 1950er Jahren waren hochwertige Fahrräder in den USA sehr selten. Einer derjenigen, die die Fackel hoch hielten, war ein Fahrradhändler aus Bosten namens Charlie Hamburger, der einen Fahrrdladen nähe der Soth Station hatte. Sheldon Brown hat ihn nie getroffen oder mit ihm gesprochen, aber Hamburger hatte einen Ruf als Perfektionist, der "Nur Das Beste" akzeptierte. Neben der tatsache, dass er vermutlich der Esrte warm, der Campagnolo Fahrradteile in die USA importierte, kaufte er auch Fahrräder, die nach seinen Spezifikationen in Frankreich hergestellt wurden. Einer seiner Hauptquellen soll René Herse gewesen sein. Andere Modelle waren von Peugeot. Er verkaufte seine Fahrräder unter dem Markennamen OTB (Only The Best - zu Deutsch "Nur Das Beste").
Sheldons O.T.B.
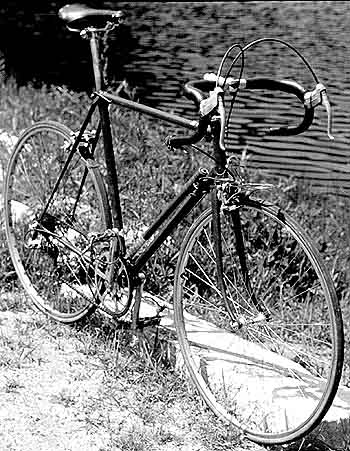
Sheldons Einführung in die Marke begann in den frühen 1970er Jahren als er für "Bicycle Revival" in Cambridge (Massachusetts) arbeitete. Ein Kunde kam mit seinem OTB vorbei, das er verkaufen wollte. Sheldon kaufte es. Der Kunde hatte 1957 Charlie Hamburger geholfen, sein Ladengeschäft auszuräumen und zu schließen und bekam als Bezahlung den OTB Rahmen (nach seiner Wahl). Er stattete es mit Bauteilen nach seinem Gusto aus und nutzte es für Radwanderungen.
Der Rahmen
Der Rahmen wurde laut Aufkleber auf dem Sitzrohr aus Super Vitus Rohren hergestellt und hat moderat ornamentierte Muffen. Obwohl der Rahmen "model course speciale" (Spezialrennmodell) bezeichnet wurde, ist seine Geometrie eher wie ein halbwegs modernes Tourenrad einzuschätzen: 72° Winkel, 22 Zoll (56 cm) Oberrohr. Das ungewöhnlichste Bauteil sind die Sitzstreben, die die schmalsten sind, die Sheldon Brown je gesehen hat.
Der Rahmen orange-rot lackiert und hat dunkelrote Nadelstreifen. Der Lack war beim Kauf in so einem schlechten Zustand, dass Sheldon ihn selbst repariert hat. Das war jedoch ein ziemlich amateurhafter Versuch, der nur aus der Entfernung gut aussieht.
Originalaustattung
Als Sheldon Brown das Fahrrad gekauft hat, war es mit einer Achtgang Kettenschaltung und alpiner Übersetzung ausgestattet. Es hatte einen "Rosa"-Kurbelsatz mit Splintbefestigung, 48/30 Kettenblätter und einen Cyclo Freilauf mit 14/16/19/26er Ritzeln. Es war ein Simplex Umwerfer und Schaltwerk verbaut, die mit einfachen am Sitzrohr montierten Hebeln, bedient wurden. Weitere Ausstattungsmerkmale waren eine Lam Seitenzugbremse und ein Satz nette Fiamme 622 mm (700C) Wulstreifen
Sheldons Fahrrad Nummer 1
After a few modifications, this became my main bike. I installed Sun Tour VGT derailers, Mafac centerpulls (state-of-the art at the time!), a Brooks Swallow saddle, wheels with Campagnolo Record hubs (high-flange rear, low-flange front) Weinmann wood-filled rims, Clément Criterium Seta tubulars, and converted it to a 10-speed, with a TA 51/26 crankset, and a 14/16/18/21/24 freewheel. This gave me a good cruising range on the 51, with the 26 used as a granny. Until I built my own frame, this was my pride and joy.
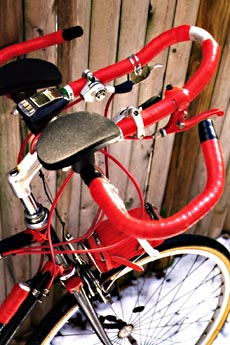
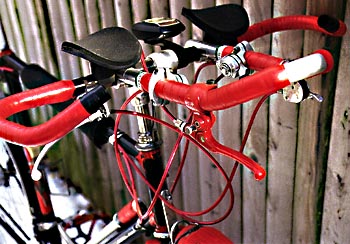
An unusual feature of this bike was my home-made handlebar end shifters, made by mounting a down-tube shift lever just inside the end of the handlebar, so that it hung down inside the bar. These shifted in the opposite direction of normal barcons, and I rather preferred it that way. I've never been much of a racer, but the one time I raced this bike, in a citizens' race that involved a substantial off-road stretch on a hiking trail with lots of exposed tree roots, I got to pass a lot of people, thanks to the fact that I could shift while they couldn't. It also helped that I was a pretty experienced off-road cyclist, because I was in the habit of riding this bike around local hiking trails, singletrack, etc. The low gear really helped in those conditions, though the silk tubulars were not the ideal tires.
Another unusual setup detail of this bike was the pre-æro "æro" brake levers. (Installed after the photo above was taken.) These were conventional Weinmann levers, except that I ran the cables out the bottoms of the levers, rather than the tops. This was a very cool-looking effect back before the invention of modern "æro" levers, and also provided handy access to my handlebar bag (everybody used handlebar bags, back then!)
30 Gänge
After I built the Brown, which was conceived as an Italian-style criterium bike, I got more adventurous with the O.T.B. I converted it to 630 mm (27") clinchers and made it into a 30-speed, by attaching a 14-24 cluster to a Sturmey-Archer AW 3-speed hub. I rode it this way for several years, until I got the mountain-biking bug in the late '70's, and needed to pirate the 30-speed rear wheel to put on my kidback tandem.
Der letzte Aufbau
Being a firm believer that nothing exceeds like excess, I eventually turned my O.T.B. into a bit of a project bike. When Specialized introduced the Saturne X-22 rim, the first really light, narrow 559 mm (26" MTB size) (unless you count the handmade, cut-down Bontragers) I bought a pair of them, a pair of Panaracer 26x 1.5 radial tires, and built her up as a 63 speed machine. My hope was to make a bike that would do everything, on- or off-road. The frame had pretty good clearance to begin with, and the smaller diameter of the 559 mm rims/tires was easy to accommodate, as long as the tires were not too wide to fit between the chainstays.
The Panaracer radials turned out to be extremely unpleasant to ride (they are fast and efficient, but they always feel flat, there is a lateral floppiness that is just intolerable, at least with the narrow rims.) I replaced them with Specialized Streetstompers, which worked pretty well on and off road. I found that I did not enjoy riding this bike off road too much, however, so I replaced the Streetstompers with Specialized "Fat Boys", which are still in use. (Has any tire ever had a less appropriate name than the "Fat Boy?" When you consider that, at the time it was introduced, this tire was the skinniest tire available for this rim size, what could they have been thinking?)
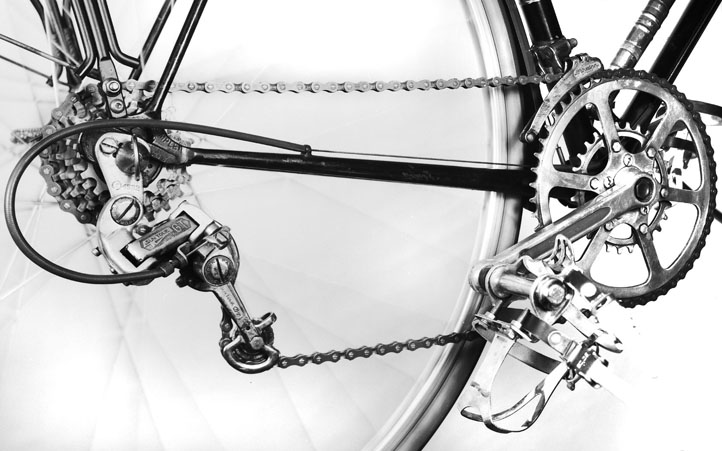
It isn't easy to fit seven sprockets onto a Sturmey-Archer hub!
63 Gänge
The O.T.B. currently sports a Sturmey-Archer AW 3-speed hub, with 7 sprockets, driven by 3 chainwheels: 3 x 7 x 3 = 63. When people hear that I have built a 63-speed bicycle, the first question they ask is "do you really need all those gears?"
The answer, of course, is "no.", but I don't actually need all the gears on a ten speed either. In fact, most of my riding is done on one-speed (fixed-gear) bikes. Nobody needs 63 gears, but it was an interesting and amusing mechanical challenge to put it together, and it does give a very wide range, with close spacing between ratios. There are probably gears that this bike has never actually been ridden in!
Actually, I guess I was just ahead of my time, because a similar setup is now offered by Sachs, a 3-speed hub which is designed to take a 7-sprocket cassette. Nevertheless, as far as I know, I am the first to succeed in getting 7-sprockets to work on a Sturmey-Archer hub!
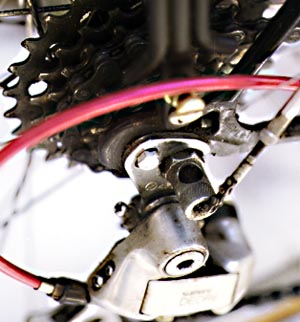
The toughest challenge of this was getting enough axle length. I used the longest Sturmey-Archer axle available, but even that was far too short for a normal installation on the right side. I used a conical countersink drill bit to countersink a hole into the adaptor claw, then I bevelled the edges of the special axle nut so that they would fit into the countersink. This only gives 5 or 6 threads of engagement, but since the countersinking prevents the axle from being able to slide forward, that is enough. Axles on internal-gear hubs have a tendency to rotate if not secured solidly, so I took extra pains on the left side to use the appropriate anti-rotation washer, and two nuts, both tightened quite snugly.
The cluster is a Sun Tour "Ultra 6" unit, which is threaded onto a threaded (old-style) Sturmey-Archer driver. This means of attachment leaves the freewheel rather far from the spokes, so far that there is room for a seventh sprocket. I have mounted the extra sprocket by bolting it (a 28 tooth) to the 24 tooth sprocket on the freewheel. (On my 54-speed tandem, I did a similar modification, turning a 5-speed 14-28 freewheel into a 6-speed 14-36, using an old T.A. chain ring as a rear sprocket.
Die Bremsen
When I substituted 559 mm (26") wheels for the original 622 mm (700c) size, the brakes would no longer reach the rims. For the rear brake, I used a BMX-type sidepull caliper, but for the front I wanted to retain the existing Mafac centerpull. I was able to do this by making an extender for the brake.
I used two short strips of aluminum bar stock (3/4" x 1/8"), and drilled 6 mm holes in each the end of the strips. I bolted the upper ends of the strips to the fork crown, using a long bolt running through the crown where the caliper would normally mount. One strip was in front of the crown, the other in back of it. The caliper then mounts through the lower holes in the two strips. I have a stack of washers between the bottom ends of the strips to hold them apart. This lowered the caliper by the distance between the holes in the strips.
I have a separate page on Home-made Drop Bolts, which explains this in more detail.
Doppelt angesteuerte Vorderradbremse
When I installed a clip-on ærobar, I found it a bit scary to go fast with my hand so far from the brake, so I rigged a second brake lever. This lets me use the front brake either from the normal bars or from the clip-on. I made a special yoke for the front brake, which has a cable stop with an adjusting barrel, instead of an anchor bolt. There is a single cable running in housing from the ærobar brake lever, looping down so that it comes up to the yoke from below. When the ærobar lever is squeezed, this housing pushes up on the yoke from below. The cable runs normally from the yoke to the normal brake lever. One of the levers has an anchor bolt in it, to secure the plain end of the cable.
The lever on the ærobars is a freestyle-type lever, which has a "stopper" button, allowing it to be locked up to serve as a parking brake. This handy feature has been included on several of my bikes. It helps keep the bike from falling over when it is leaned up against a wall or other object. It also provides a bit of protection against opportunistic thieves when doing quick errands in low-risk areas.
Quelle
Dieser Artikel basiert auf dem Artikel My O.T.B. - Only The Best von der Website Sheldon Browns. Originalautor des Artikels ist Sheldon Brown.
- Ritzelabstände (Tabelle)
- Sattelstützenmaße
- Knarzen, Knacken und Quietschen
- Auswechselbarkeit von Vierkant-Kurbelaufnahmesystemen bei Innenlagern
- Kettenlinienstandards (Tabelle)
- Ein bequemer Sattel
- Nabenbreiten (Tabelle)
- Alles über Nabenschaltungen
- Shimano Nexus und Alfine Acht-Gang-Naben
- Reifengrößen
